EM.Terrano Tutorial Lesson 5: Simulating A Dense Urban Canyon Propagation Scene
Contents
What You Will Learn
In this tutorial you will use the random city wizard to create an urban canyon propagation scene. You will learn how to export your propagation scene and import it later to a new project.
![]() Back to EM.Terrano Tutorial Gateway
Back to EM.Terrano Tutorial Gateway
![]() Download projects related to this tutorial lesson
Download projects related to this tutorial lesson
Getting Started
Open the EM.Cube application and switch to EM.Terrano. Start a new project with the following parameters:
Creating & Analyzing a Semi-Random City Propagation Scene
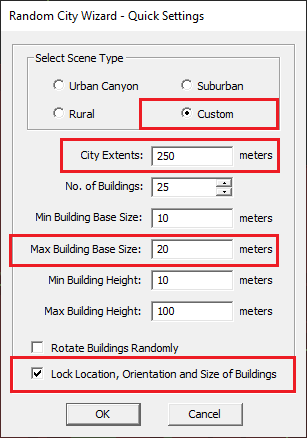
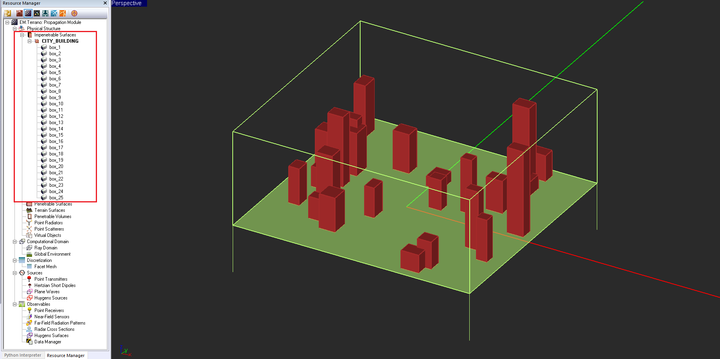
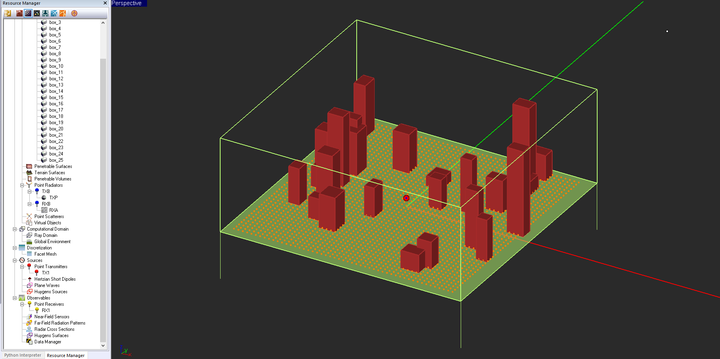
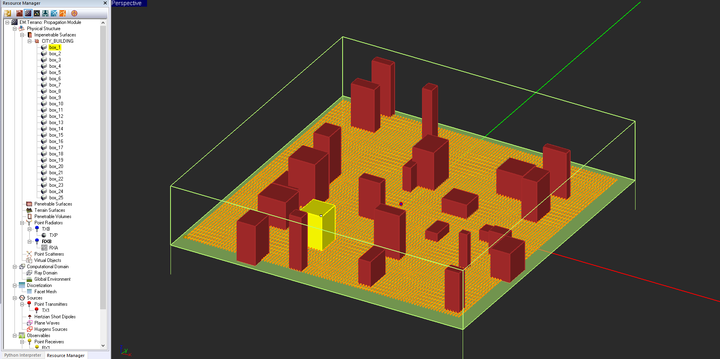
For this tutorial lesson, you will use a wizard to build the geometry of an urban environment. Click on the Random City Wizard ![]() button of the Wizard Toolbar or select the menu item Tools → Propagation Wizards → Random City. A dialog pops up and asks for the total city extents and number of buildings. Select Custom option for “Select Scene Type”. Reduce the “City Extents” to 250 and accept the default value of 25 for the total number of buildings in the scene. Change the Max Building Base Size to 20 and press the OK button. The wizard creates 25 buildings with random locations and random dimensions in an area of 250m × 250m centered at the origin of coordinates.
button of the Wizard Toolbar or select the menu item Tools → Propagation Wizards → Random City. A dialog pops up and asks for the total city extents and number of buildings. Select Custom option for “Select Scene Type”. Reduce the “City Extents” to 250 and accept the default value of 25 for the total number of buildings in the scene. Change the Max Building Base Size to 20 and press the OK button. The wizard creates 25 buildings with random locations and random dimensions in an area of 250m × 250m centered at the origin of coordinates.
Since the location of the buildings is totally random, there is a chance that your transmitter may fall inside an "impenetrable" building and becomes useless. In that case, you may change the location of your transmitter or repeat this process until you get an acceptable scene.
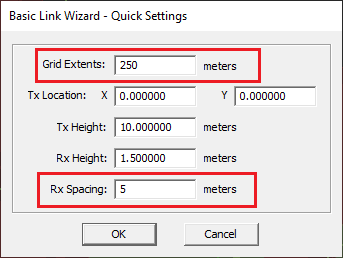
Note that since the locations and dimensions of all the buildings were created using random variables, you may get a different scene than the one shown in the above figure. Next, click on the Basic Link Wizard ![]() button of the Wizard Toolbar or select the menu item Tools → Propagation Wizards → Basic Link. A dialog pops up and asks for the total grid extents, transmitter height, receiver height and receiver spacing. Change the Grid Extents and receiver (Rx) spacing to 250m and 5m, respectively, and keep all the other default values: transmitter height of 10m, receiver height of 1.5m. The wizard creates a single transmitter and a very dense grid of 51×51 receivers centered at the origin of coordinates.
button of the Wizard Toolbar or select the menu item Tools → Propagation Wizards → Basic Link. A dialog pops up and asks for the total grid extents, transmitter height, receiver height and receiver spacing. Change the Grid Extents and receiver (Rx) spacing to 250m and 5m, respectively, and keep all the other default values: transmitter height of 10m, receiver height of 1.5m. The wizard creates a single transmitter and a very dense grid of 51×51 receivers centered at the origin of coordinates.
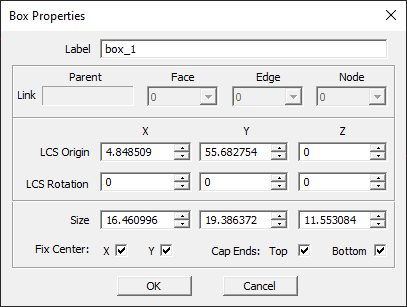
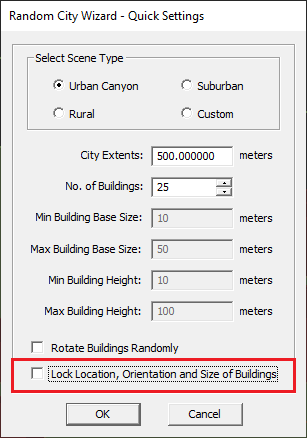
Remember that in the random city wizard dialog, the box labeled Lock Location, Orientation and Size of Buildings was checked by default when you first created your scene. This creates a semi-random scene, meaning all the LCS coordinates and dimensions of the buildings are picked randomly at the time of creation. But they are all then fixed afterwards. Select the first building called "Box_1" and open its property dialog. You will see some arbitrary numeric values for the coordinates and dimensions of the box object. That is also true for all of the other 24 box objects in your project workspace.
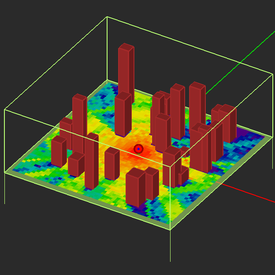
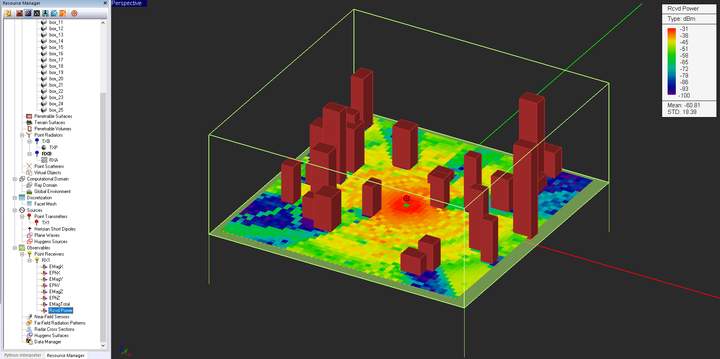
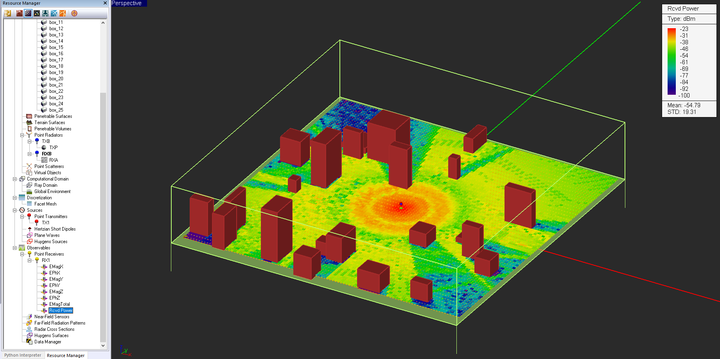
Run an SBR analysis of the random city scene and visualize its received power coverage map.
You can rotate the view of your project workspace using the right mouse button (RMB). Right-click on any blank space and drag the mouse around to rotate the view. When you release the RMB, you return to the normal view mode.
Exporting Your Urban Canyon Scene
A fully random city scene changes very quickly with few mouse clicks. This is helpful at the beginning when updating the random variables until you get a desirable scene. After that, the random feature may not be useful. EM.Cube allows you to export your physical structure to a number of popular CAD file formats such as STEP, IGES, STL, etc. The STEP and IGES options export all the solid, surface, curve and point objects. The STL format exports only solid and surface objects as sets of interconnected triangles and ignores all the curve or point objects. This is more suitable for propagation scenes if you don't want to exports all the point radiators. CubeCAD is the module where import and export operations should normally take place. For convenience, you can export your physical structure from any module including EM.Terrano. However, you can import external files only to CubeCAD.
In the case of stereolithography (STL) file export, EM.Cube offers two options: ASCII STL and Binary STL. The latter format results in a more compact file. You can generate a triangular surface mesh of objects in CubeCAD. This mesh is what is exported as the STL file. EM.Cube allows you to control the shape and size of the triangular patches that are used to model your objects. Switch to CubeCAD by clicking its button at the top of the navigation tree. Then, clicking the Mesh Settings ![]() button of the Simulate Toolbar in CubeCAD or use the keyboard shortcut Ctrl+G to open the CAD Mesh Settings Dialog. Change the value of Mesh Cell Size to 100 units. This will generate very large triangular patches or cells. The parameter Mesh Cell Size is the counterpart of Cell Edge Length in EM.Terrano's SBR Mesh Settings dialog, which you already encountered in Tutorial Lesson 3.
button of the Simulate Toolbar in CubeCAD or use the keyboard shortcut Ctrl+G to open the CAD Mesh Settings Dialog. Change the value of Mesh Cell Size to 100 units. This will generate very large triangular patches or cells. The parameter Mesh Cell Size is the counterpart of Cell Edge Length in EM.Terrano's SBR Mesh Settings dialog, which you already encountered in Tutorial Lesson 3.
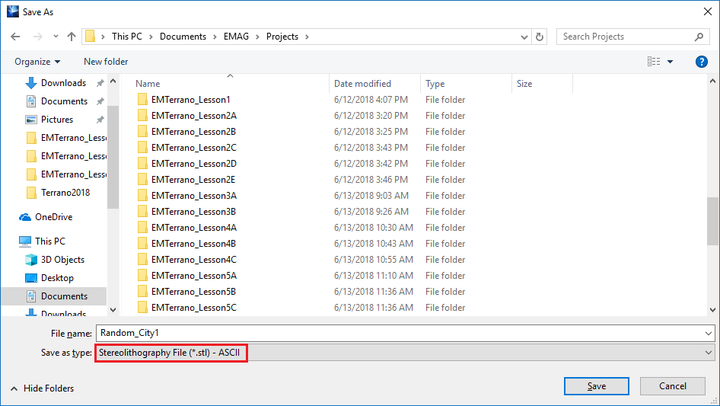
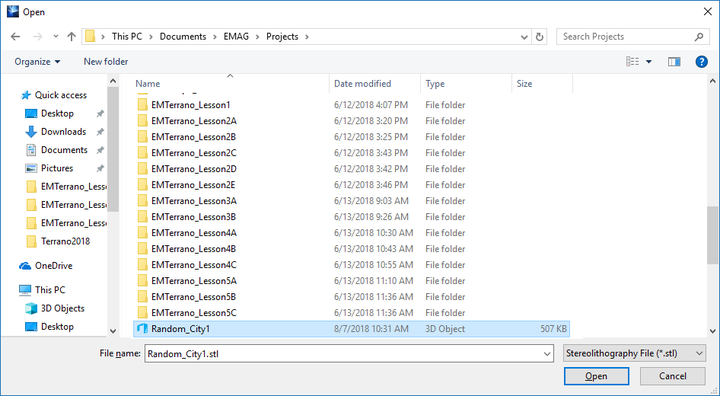
Return to EM.Terrano. Once you finalize your random city scene, select the menu item File → Export.... The Windows Save Dialog opens up. From the File Type drop-down list, select STL. Use the Windows Explorer to browse you folders and decide where you want to place the your export file. Enter a name, for example, "Random_City1" for your new file and click the Save button of the dialog. A new file called "Random_City1.STL" is created in the specified folder.
Importing Your Scene to a New Project
In the last part of this tutorial lesson, you import your urban canyon model to a new project. Exit EM.Cube application and start a brand-new project with projects units of "Meters".
| |
You can import external CAD models to CubeCAD only. From CubeCAD you can move objects to other modules like EM.Terrano. |
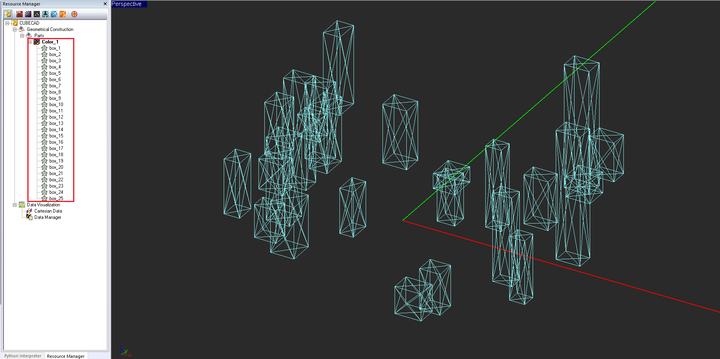
While in CubeCAD, select the menu item File → Import.... The Windows Open Dialog opens up. From the File Type drop-down list, select STL. Use the Windows Explorer to go to the folder where your STL file was saved. Select "Random_City1.STL" and click the Open button of the dialog. Your urban canyon scene appears on the screen in grey color. When you import a very large object, it may full up the entire screen. You can zoom to fit your structure into the screen using the keyboard shortcut Ctrl+E or by clicking the Zoom Extents ![]() button of View Toolbar.
button of View Toolbar.
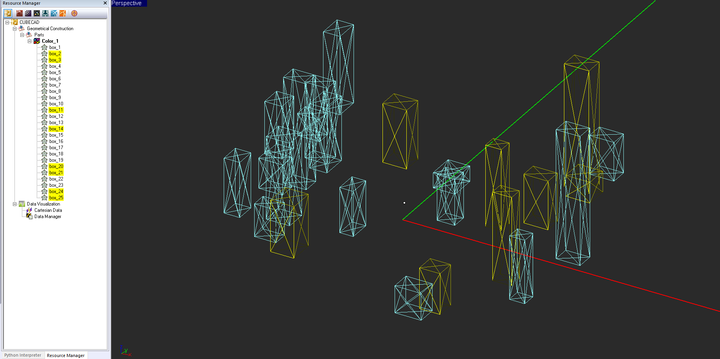
You can cut, copy or paste these buildings to EM.Terrano. Or you can move some of them or all of them directly from CubeCAD to EM.Terrano. You can select any building from the navigation tree. To make a multiple selection, hold down your keyboard's Ctrl key while clicking on the buildings' names in the navigation tree. From the figure below, you can see that the imported buildings are no longer box objects, but they were imported to the new projects are "polymesh" objects consisting of sets of triangular patches.
Creating & Analyzing a Fully Random City Propagation Scene
At this point, start a brand-new project all over again and repeat the the same steps of the previous section. First, create a random city scene using the random city wizard. However, this time, select Urban Canyon option for “Select Scene Type” and remove check mark from the box labeled Lock Location, Orientation and Size of Buildings. Using the basic link wizard, place a transmitter and a 51×51 receiver grid with the same parameters as in the previous section.
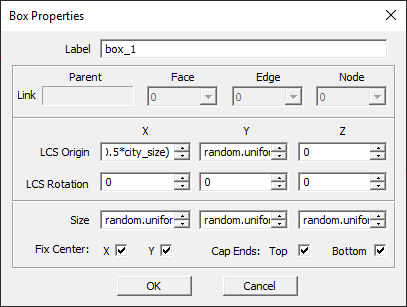
Select the first building called "Box_1" and open its property dialog. This time you will find that the coordinates and dimensions of the box object are defined by a number of functions given in the table below:
| Parameter Name | Value/Definition |
|---|---|
| X-Coordinate | random.uniform(-0.5*city_size,0.5*city_size) |
| Y-Coordinate | random.uniform(-0.5*city_size,0.5*city_size) |
| Z-Coordinate | 0 |
| X-Size | random.uniform(building_base_min,building_base_max) |
| Y-Size | random.uniform(building_base_min,building_base_max) |
| Z-Size | random.uniform(building_height_min,building_height_max) |
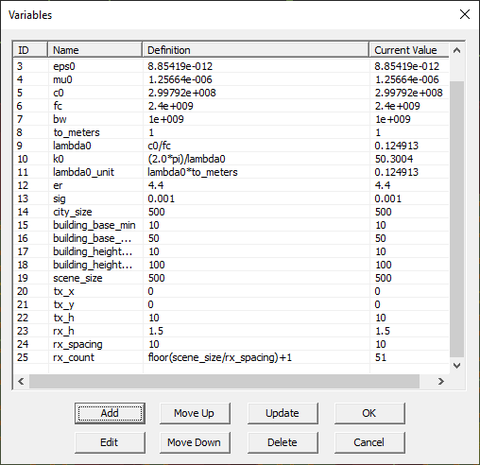
The function random.uniform(a,b) is a Python function that generates a random number with a uniform distribution between the two values a and b. In the above table, "city_size", "building_base_min", "building_base_max", "building_height_min" and "building_height_max" are project variables that were defined and initiated by the random city wizard.
The transmitter is located at (0, 0, 10m) by default. Since the location of the buildings is totally random, there is a chance that your transmitter may fall inside an "impenetrable" building and becomes useless. In that case, open the variables dialog and click its Update button consecutively. Every time a new random city scene is generated. Repeat this process until you get an acceptable scene. Run an SBR analysis of the random city scene and visualize its received power coverage map.
