System-Level Tutorial Lesson 4: Exploring Phase-Locked Loops
Contents
What You Will Learn
In this tutorial you will learn how to test and use one of RF.Spice's more complex black-box virtual blocks with a large number of parameters: the analog phase-locked loop (PLL).
Overview of PLL Operation
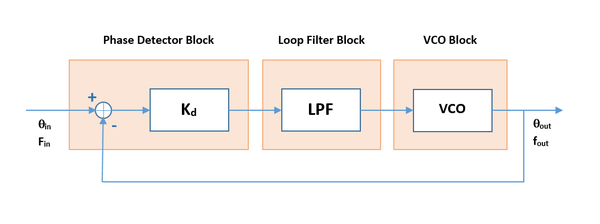
A phase-locked loop (PLL) is a feedback control system that generates an output signal whose frequency and phase are related to the frequency and phase of an input signal also known as the reference signal. At the heart of a PLL there is a voltage-controlled oscillator (VCO) along with a phase detector. The oscillator initially generates a periodic signal with a certain free-running frequency. The phase detector compares the phase of the VCO signal with the phase of the input periodic signal and adjusts the oscillator to keep the phases matched through the feedback loop. It is clear that keeping the input and output phase in lock step also implies keeping the input and output frequencies the same.
To better understand the operation of the PLL block, consider the highly simplified schematic shown in the figure below. The output of the internal lowpass filter section is directly fed into the input of the internal VCO section, and the output of the VCO section is directly fed back into one of the two inputs of the internal phase detector section. The lowpass filter is a simple RC filter, and you can adjust the values of RLPF and CLPF. The internal VCO section involves a timing RC circuit (integrator), and you can adjust the values of Rtime and Ctime. The nonlinear voltage-controlled source Bpd generates a scaled version of the difference signal (Vin-Vout) with a scaling factor of Kd. The transconductance of the voltage-controlled current source Gvco is equivalent to the conversion gain Kf of the VCO.
Testing the APLL Device
The following is a list of parts needed for this part of the tutorial lesson:
| Part Name | Part Type | Part Value |
|---|---|---|
| VS | Voltage Source | Waveform TBD |
| X1 | Analog Phase-Locked Loop (APLL) | Defaults, fo = 100kHz |
| R1 | Resistor | 50 |
| IC1 | Transient Initial Condition Marker | 1V |
Place and connect the parts as shown in the Figure below.
You can access the APLL device from Menu > Parts > Spectral Processing Blocks > Phase Locked Loop (PLL) Block. Set the free-running frequency of the PLL's VCO to 100kHz and keep all the other default values.
The Transient Initial Condition Marker labeled IC1 with a prescribed voltage of 1V is placed at the output of the square wave VCO output to the give the oscillator circuit the initial kick.
Define a sinusoidal waveform for your voltage source according to the table below:
| Offset Voltage | 0 |
|---|---|
| Peak Amplitude | 1 |
| Frequency | 100kHz |
| Delay Time | 0 |
| Damping Factor | 0 |
Run a Transient Test of this circuit with the parameters specified below:
| Start Time | 0 |
|---|---|
| Stop Time | 100u |
| Linearize Step | 10n |
| Step Ceiling | 10n |
| Preset Graph Plots | v(1), v(4), v(5) |
The voltage graphs are shown in the figure below. The RF.Spice's APLL device provides a square wave output as well as a triangular wave output, both of which are phase-locked with the input signal. This can be clearly seen from the figure by comparing the phases of the red input sinusoid and the light blue output triangular wave.
Building & Testing a Harmonic Mixer
The following is a list of parts needed for this part of the tutorial lesson:
| Part Name | Part Type | Part Value |
|---|---|---|
| VLO | Voltage Source | Waveform TBD |
| VIF | Voltage Source | Waveform TBD |
| A1 | Multiplier Block | Defaults |
| X1 | x3 Frequency multiplier Block | Defaults |
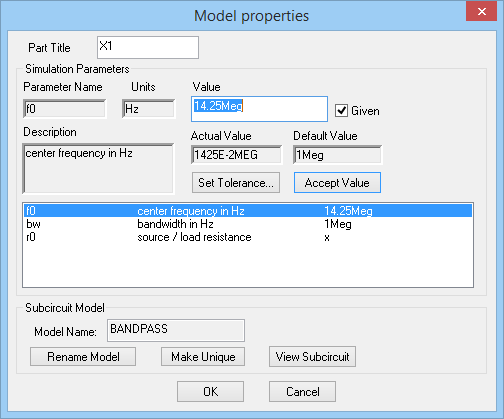
| X2 | Generic Bandpass Filter Block | Defaults, Center Frequency = 360kHz, Bandwidth = 80kHz |
| R1 | Resistor | 50 |
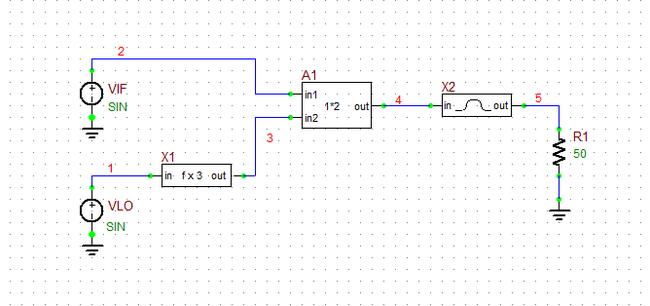
In a harmonic mixer, a harmonic of one input is mixed with the other input. In this project, you will use a frequency tripler virtual block to get the third harmonic of the LO signal, and will mix it with the IF signal using the Multiplier Block, which is a two-signal analog operation block. At the output of this block, you will have both frequencies 3*fLO ± fIF. With fLO = 100KHz and fIF = 60kHz, the output of the mixer (the A1 block) will have 360kHz and 240KHz spectral components. Then, you use a generic bandpass filter block to reject the 240kHz signal component. Set the center frequency of the filter to 360kHz and it bandwidth to 80kHz to have an effective passband from 320kHz to 400kHz.
Place and connect the parts as shown in the figure below:
Set the waveforms of the two voltage sources VLO and VIF according to the following table:
|
|
Run a Transient Test of this circuit with the parameters specified below:
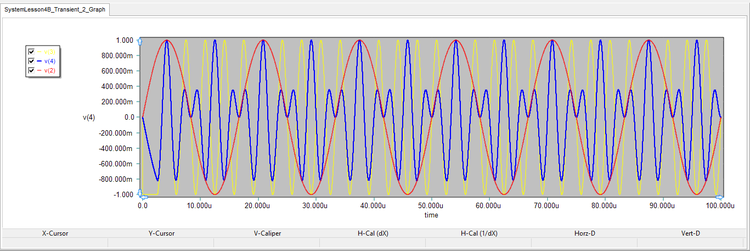
The output voltage graph are shown in the figure below. As you see from the figure, its take a while until the amplitude of the output signal stabilizes. That's why you chose a relatively large value for the stop time. Using the graph window's "Delta Line Mode" try to measure the period of the output signal. You will find it to be about 2.78μs, which means a frequency of 359.7kHz as you would have expected. Run another transient test but this time with outputs plots for v(2), v(3) and v(4). As you can see from the figure below, the output of the block X1 has a frequency of 300kHz = 3*fLO. The output of the block A1 has a mix of both 360kHz and 240kHz frequencies. Locking the PLL With the Harmonic MixerThe following is a list of parts needed for this part of the tutorial lesson:
In this part of the tutorial lesson, you will build a QAM demodulator circuit. To test your demodulator circuit, you will initially use an AM-modulated voltage source for the input signal. This source is accessible from Menu > Parts > Waveform Generation Blocks > Modulated Waveforms > Single-Tone AM Modulated Source. It represents a sinusoidal baseband signal of frequency fs modulated on a carrier frequency of fc. The AM waveform can be expressed as: [math] y(t) = A_c \left( 1 + m x(t) \right) cos(2\pi f_c t) = A_c \left( 1 + m A_s cos(2\pi f_s t) \right) cos(2\pi f_c t) [/math] where fc and fs are the carrier and signal frequencies, respectively, and m (the MDI parameter) is the modulation index or depth. m = 0 means no modulation, and m = 1 represent full modulation. You are going to feed an AM modulated signal with a signal frequency of 300MHz, a carrier frequency of 3GHz, a carrier amplitude of 15V and a modulation index of m = 1.
Place and connect all the parts as shown in the figure below. For the receiver circuit, instead of a Wilkinson power divider, you will use a simpler resistive power divider. Set the lengths of the input and output feed lines to a minimum: len_in = len_out = 2mm. For this part, you will use the "Limiter Block" simply as an amplifier with a gain of 5. For the peak detector block of the receiver circuit, you will use a full-wave bridge rectifier together with a simple RC filter. The analog binary output of this circuit fluctuates between low and high voltage levels. Finally, the Ideal Comparator Block compares the output of the peak detector circuit to a fixed DC voltage of +4V. Set the gain of the comparator to 10. This may also serve as an IF or baseband amplifier. The output of the comparator is converted to a digital output using s ADC bridge. Run a Transient Test of your modulator circuit with the following parameters:
The results are shown in the figure below. As you can see from the figure, the voltage signal v(7) at the output of the peak detector (plotted in dark blue) is a good reconstructed replica of the baseband 300MHz sinusoidal signal. Compare this signal to the envelope of the input AM-modulated signal plotted in yellow. You can use the "Delta Line Mode" of the graph window to measure the period or clock rate of the binary output, which is about 3.34ns consistent with the signal frequency of fs = 300MHz.
|


